Stacking can’t always tell which frame is right: a bristle in front of a blurred background, a halo along an edge, a hair that moved between frames. The Retouch tab fixes those by hand, painting from a frame (or from another output) onto the result. Retouching is non-destructive: each stroke is a record kept in the project, layer by layer, and the result is the output with its strokes painted over it, so strokes can be undone, layers hidden, and the work picked up again in a later session.
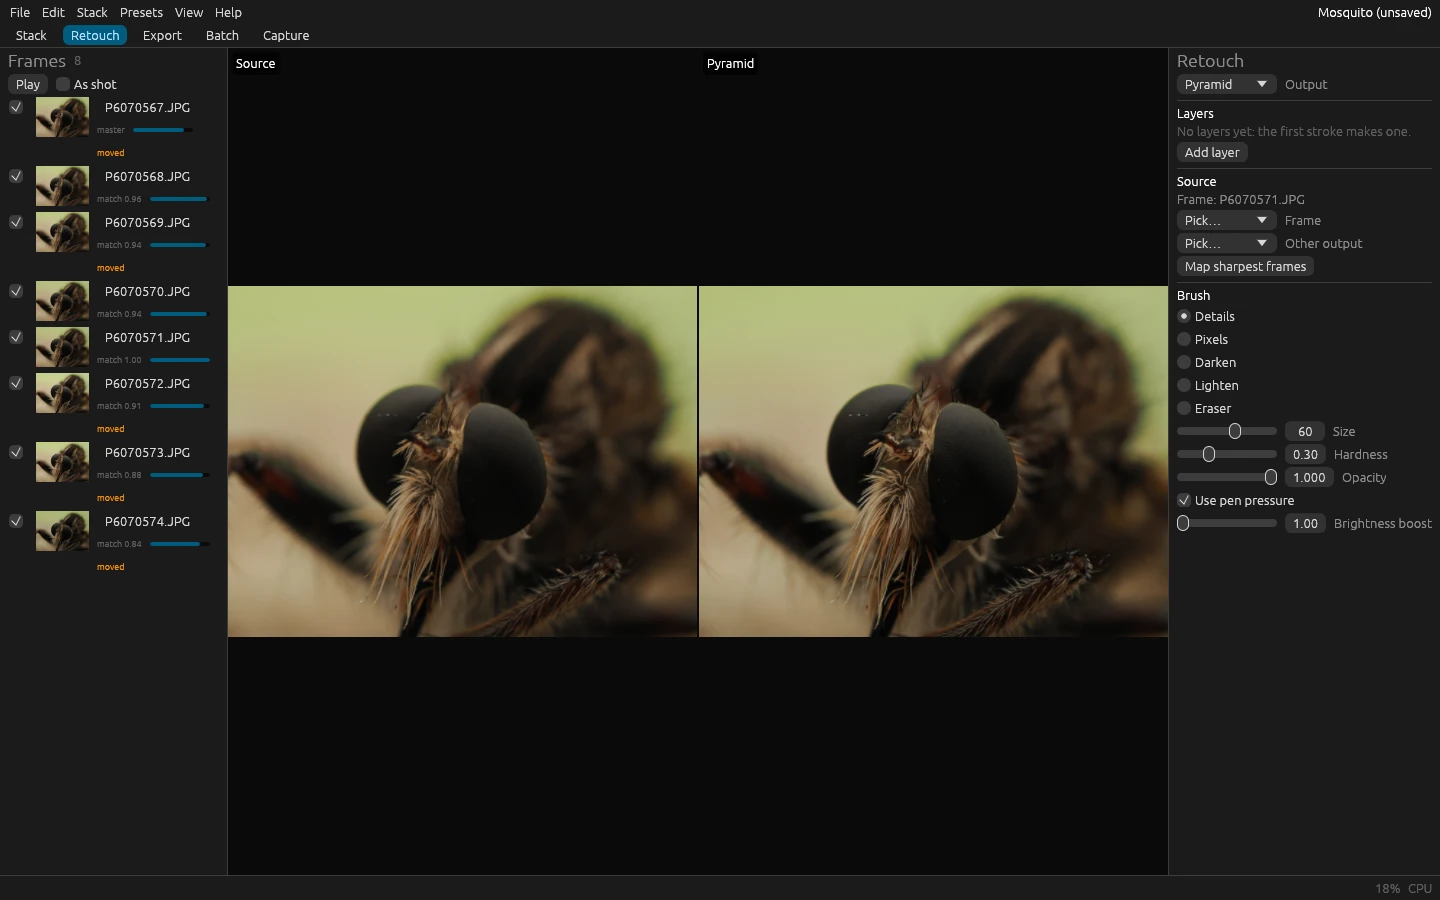
A first retouch, step by step
- Open the output. Stack the frames, then open the Retouch tab: it opens the output selected in the outputs list, or the newest. The output is on the right; the source, the image strokes paint from, will be on the left. The two views zoom and pan together.
- Find a flaw. Zoom in on the output with the mouse wheel, and pan with the middle or right button (or Space and the left button). Look along edges where something near crosses something far: a smeared bristle, a halo, a doubled hair.
- Pick the source. Ctrl+click the flaw (⌘-click on macOS): the source becomes the frame where that point is sharpest, and the left view shows it. A depth-map output knows its sharpest frames already; for a pyramid or weighted-average output, press Map sharpest frames once first, which measures the frames’ focus and keeps the map with the output. Check the left view: the bristle should be sharp there. If it isn’t, pick a neighboring frame in Frame.
- Choose the brush. Details, the default, is the brush for most repairs: it paints the source’s detail with its brightness and color matched to the output, so that the stroke blends in. For a dark bristle over a light background, Darken paints only where the source is darker and leaves the background between the bristles alone; Lighten does the opposite.
- Size it.
[and]make the brush smaller and larger; its circle shows in both views, so you can see what a stroke will bring before you paint. Make it a little wider than the flaw. - Paint. Drag over the flaw on the output. The stroke shows as you draw, and becomes one undo step when you let go: Ctrl+Z takes it back, Ctrl+Shift+Z brings it again.
- Group and compare. The first stroke makes “Layer 1”. Add layer starts another, for the next group of repairs; untick a layer to hide its strokes and see the output without them.
- Keep it. Save the project (Ctrl+S): the strokes are part of it. Exporting the output (the Export tab) writes it with its visible strokes.
Painting from another output
A stack made with Both has a pyramid and a depth-map output of the same frames. Where one method is right and the other wrong (the pyramid’s crisp bristles, the depth map’s smooth background), retouch one from the other: pick the other output under Other output as the source and paint, with Pixels to copy it exactly or Details to blend it. A slabbed stack’s slabs are outputs too, each near in focus to its part of the subject. Only outputs with the same framing can be a source.
How it works
- Two views. The source is on the left and the output being retouched on the right, with zoom and pan locked together. The brush’s circle shows at the same point in both.
- The source. Pick a frame or another output in the panel. Or Ctrl+click a point of the output, and the source becomes the frame where that point is sharpest. With Follow the sharpest frame on, resting the pointer on a point does the same.
- Painting. Drag on the output to paint; the stroke shows as you draw it and becomes one undo step when you let go.
Pan with the middle or right button, or with Space and the left button; zoom with the wheel.
[and]make the brush smaller and larger. - Layers. Strokes go into the layer picked in the panel, or the top one; the first stroke makes “Layer 1”. Hide a layer to see the output without its strokes.
Brushes
- Details (the default) paints the source’s detail with its brightness and color matched to the output’s, so that a frame a little brighter or tinted than the stack paints seamlessly. Its edge is hard where there is fine detail (so a hair comes through whole, without a ghost) and as soft as its hardness elsewhere (so it blends).
- Pixels paints the source exactly as it is.
- Darken and Lighten paint only where the source is darker (or lighter) than the result: a dark bristle over a light background, without touching the background between the bristles.
- Eraser brings back the output as it was stacked.
Every brush has a size (its diameter, in pixels of the output), a hardness (how much of it paints fully before its edge fades) and an opacity. With Use pen pressure on, a pen’s pressure makes the brush smaller where the system reports it (Windows). The Brightness boost shows both views brighter for working in dark regions; it changes only what you see.
What is kept
- Strokes are kept in
project.json, each with its brush, settings, source and the pointer’s path, in pixels of the output. Painting them again over the same images gives the same pixels, bit for bit, which is what makes undo exact and later sessions reliable. - When the project is saved (and when another output is opened for retouching), the retouched result is cached with the output, so that opening it again needs no recomputation. Frames used as sources are cached too, warped onto the output’s canvas, so that they are read rather than decoded again.
- Exporting a retouched output (Export tab,
output.save) writes it with its visible strokes.